2.1 Equipment
- TL082 pH probe (x1)
- Arduino (x1)
- Voltmeter (x1)
- Beakers of water (x7)
- Sulphuric acid to make water acidic (100 mL) (x1)
- Baking soda (sodium bicarbonate) to make alkaline ( 100ml) (x1)
- pH stamp from Atlas Scientific (Version 5) (x1)
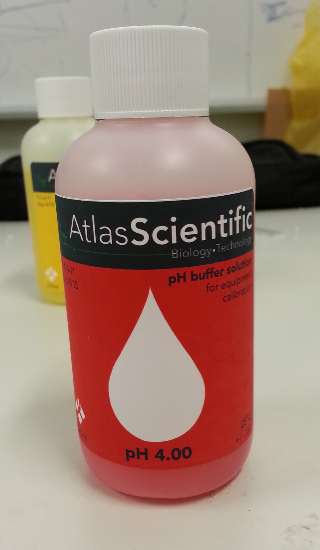
- pH Buffer Solution (pH 4) (x1)
- pH Buffer Solution (pH 7) (x1)
- pH Buffer Solution (pH 10) (x1)
- Jumper Wires (different colours for colour coding) (x30)
- Potentiometer (x1)
- 30x10 Breadboard (x1)
- 16x2 LCD Screen
- Macbook Pro (or any laptop compatible with Arduino) (x1)
- Arduino to Laptop USB cable (x1)
- Power Adapter (preferably one with voltage control) (x1)
- pH probe to Arduino interface shield (come in with Sparkfun pH kit) (x1)
- Alternative Solution X (x1)
- pH datasheet for data recording (optional) (x1)


2.2 Diagram
Figure 2.1

Fig 2.2
2.3 Procedures
- Purchase the Sparkfun Inventor's kit which has the pH stamp and the pH probe
- Conduct a quality check to ensure that all equipment purchased is not defective. If equipment is defective , exchange it immediately. (For example we will see whether the lcd screen works but just simply connecting it)
- Connect wires as shown below on breadboard.
- Install the code that controls the meter. See Annex 2 for code.
- Prepare three beakers of tap water, using pH buffer solution to change the pH of the different beakers. Prepare another beaker, leave pH unchanged and label it as “Control”. Label the other beakers according to their respective pH.
- First place you pH probe in the yellow pH 7 calibration solution
- Instruct the circuit to go into continuous mode
- Wait 1 to 2 minutes.
- TX the S command. The pH Circuit is now calibrated for pH 7.
- Rinse off pH sensor, dry with paper towel.
- Place pH sensor in the red pH 4 calibration solution.
- Wait 1 to 2 minutes (Circuit should still be in continuous mode)
- TX the F command.
The pH Circuit is now calibrated for pH 4
- Rinse off pH sensor, dry with paper towel.
- Place pH sensor in the blue pH 10 calibration solution.
- Wait 1 to 2 minutes (Circuit should still be in continuous mode).
- TX the T command. The pH Circuit is now calibrated for pH 10.
- Transmit the E command.
- The pH Circuit is now calibrated. The calibration data is stored in the EEPROM and will be retained even if the Circuit is powered off.
- If we manage to achieve an error margin less than 10%, we would then proceed on to improve on its functionality by making it portable.
- We would try to fit it into a compact package (that includes shrinking the size down to as small as possible)
- We would need to find a portable power source (for example (2x9V rectangular battery). The Arduino is a relative low power device (9V to 12V) and can be powered with a commercially available batteries. (more convenient)
- If we did not manage to achieve a percentage error below 10%, we would work on calibrating the sensor until we have achieve our goal. It calibration on the basis of the fact pH meters measure the electrode potential which must be related to the [H+] or [OH-] of the solution by comparison against known [H+] or [OH-] standard buffers. In other words, the pH meter must be calibrated in order to obtain accurate results (Cheng & Da, 2005).
Fig 2.3
This is the target accuracy of our developed pH sensor compared to the commercial sensor. If data from our sensor closely matches that of commercial sensor, sensor is properly calibrated.
- Document the project and include in videos and pictures and present out works as the final report ready for submission
2.4 Risk Assessment and Management
Identify the risks involved and your solutions of management of the risks.
Care must always be taken when handling tools as tools may be dangerous to handle and come with certain risk. Also, for each and every single tool there is a certain risk associated with it. Therefore, the usage of tools carries the higher risk.We must also adhere the lab rules strictly to prevent injury from incorrect usage of machinery and incorrect behaviour while in this dangerous environment.Furthermore,the Arduino board will start to heat up and melt if it is exposed to too high a voltage. So we must be careful and use it with care and caution instead of overheating it by turn it on for overnight without closing it.
To minimize the risks we should
1) Use gloves and proper lab materials when holding the test tubes of acids and alkalis.
2) Clean hands thoroughly so we do not contaminate any of the liquids.
3) Keep water away from Arduino sets and the voltmeter to prevent electrocution.
There will also be safety information in the research lab so we will do our best and adhere the rules. Furthermore there will be rules and procedures to use the arduino and the pH kit so we will not mess up the parts.
2.5 Data Analysis
We will be comparing our pH meter to a store-bought sensor. We will test our meter against the store-bought meter on jars of water that have different acidity as explained under Procedures. We will then plot the data from our pH sensor against that of the store-bought sensor. If our sensor is calibrated correctly, the line graph that is plotted should have a gradient very close to one. To obtain the percentage difference between ours and the store bought one we will be testing the pH value of a random liquid.After getting the pH values of the unknown liquid we will see the percentage difference and thus see the difference.This will be further elaborated under the Results section
No comments:
Post a Comment